I feel like this recipe has been coming for a long time and I don’t really get why it’s taken me so long to make it, but here it is.
The main reason why I’ve been dying to make this is because when I was little I used to by this kind of pre-made, pre-prepared Oreo cheesecake mix that you just had to mix up and it was basically ready. I actually tried finding it in the UK as it was super popular in Spain, but I was never lucky.
No bake cheesecake
If you’ve been here for a while you already probably know that I love a no bake cheesecake, I’m actually really bad at making “normal” cheesecakes, so these are such a good alternative. These cheesecakes are also super easy to make and super creamy, so there’s really no reason not to make them! I think they are also such a great summer dessert, these cheesecakes are frozen, so I really wouldn’t mind having them cold in the summer!
So what’s in it?
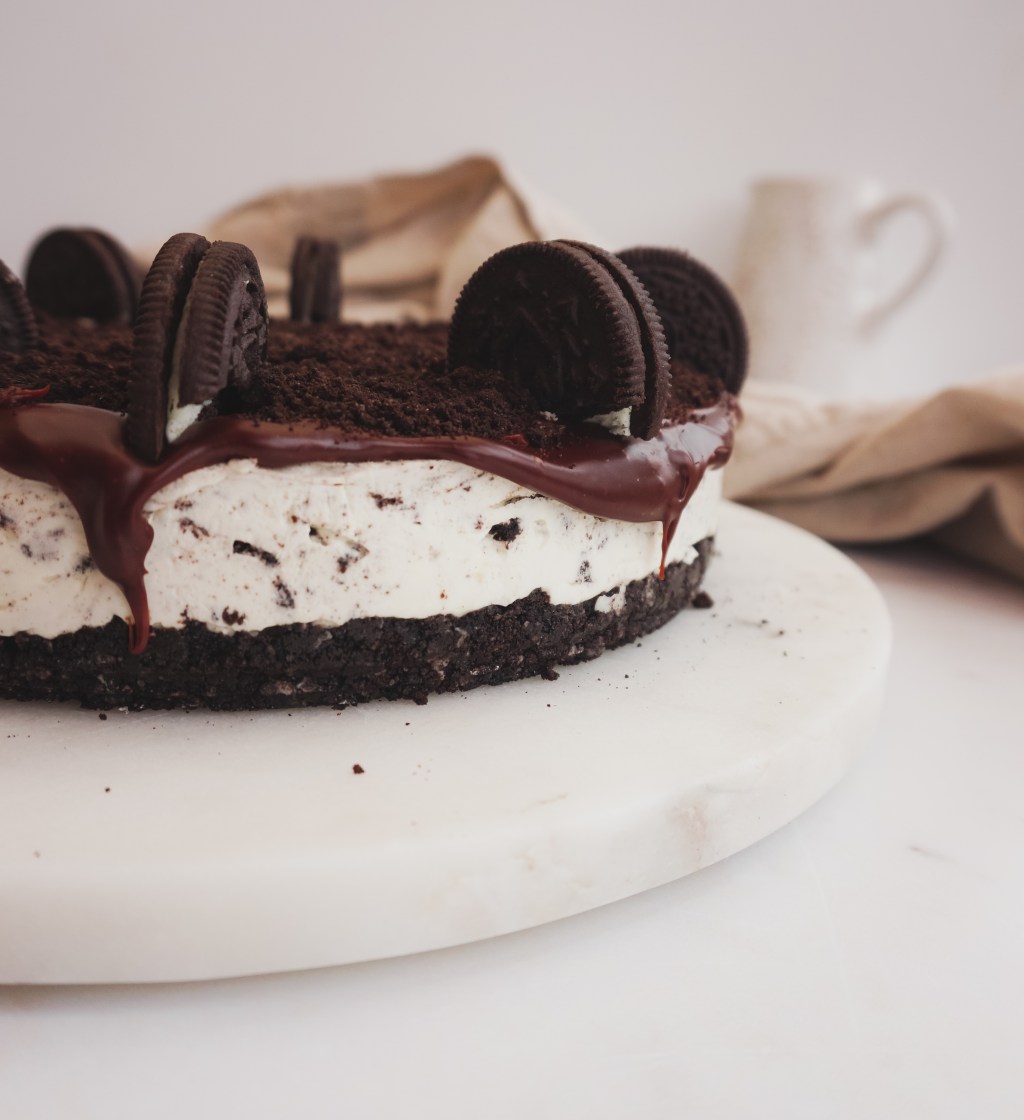
- Oreos: I mean, obviously! This cheesecake does have a great amount of Oreos in its filling, but then again, it’s an Oreo cheesecake so… Starting with the base, this cheesecake has crushed Oreos mixed with butter, then, hand cut Oreos for a crunchy filling and finally more Oreo “dust” for the top.
- Cream cheese: I think this is a staple for any cheesecake, and this one contains a full big tub of it.
- Greek yoghurt: delicious creamy greek yoghurt for extra creaminess.
- Double cream: adds the perfect texture and consistency.
- Chocolate ganache: I think it was only right to top this cheesecake with some lovely chocolate ganache. I used milk chocolate as I find dark chocolate a bit too bitter, but you’re more than welcome to used the dark version!
A few notes for success
To make things easy, I like to make this cheesecake the day before is due to be eaten and freeze overnight, if not possible, I’d advise freezing for around 4-6 hours. Once taken out of the freezer, leave outside for 1-2 hours and then keep in the fridge until it’s time to eat.
Add the ganache while the cheesecake is still frozen, since the cheesecake is hard, you will have no issues spreading it over it. It’s important to make sure the ganache is at room temperature, I think I don’t need to explain what happens if you pour something warm on something frozen!
This cheesecake will keep well in the fridge for 3-4 days.
No Bake Oreo Cheesecake
Ingredients:
- For the filling:
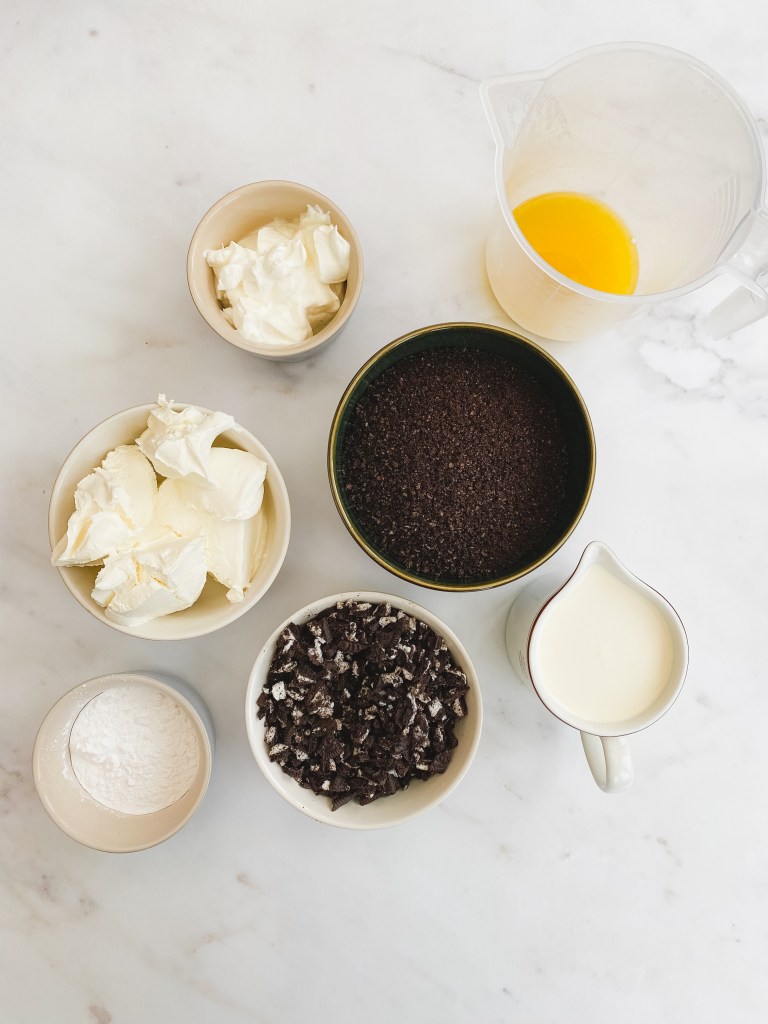
- 200 gr of Oreos
- 60 gr of butter
- 280 gr of cream cheese
- 250 gr of double cream
- 150 gr of unsweetened plain greek yoghurt
- 2 tsp of vanilla extract
- 10 oreos
- 70 gr of icing sugar
- For the top:
- 150 gr of milk chocolate
- 75 ml of double cream
- 8 oreos (optional)
Method:
- In the microwave or in a pot, melt the butter and allow it to cool down for a few minutes.
- In the meantime, crush the Oreos using either a food processor or by putting them in a bag and crushing them with a rolling pin.
- Mix the butter and the biscuits and press them on the bottom of a springform baking pan (mine was 18-20 cm/7-8 inch) and place it in the freezer so it firms up.
- To make the filling, in a large bowl use a hand mixer to beat the cream cheese, vanilla extract and greek yoghurt.
- In a separate smaller bowl, beat the double cream until soft peaks, then transfer it to the larger bowl with the cream cheese mix and fold it with a spatula.
- Take 10 oreos and cut them in small pieces, you can do this with a food processor, but I used a knife as I wanted bigger pieces that would be crunchy when bitten into. Add the cookies to the cheesecake mix and fold with a spatula.
- Take the biscuit base out of the freezer and top it with the cheesecake filling. Place in the freezer for at least 6 hours, but preferably overnight.
- A couple of hours before it’s time to eat, take it out of the freezer and allow it to sit at room temperature for an hour.
- In the meantime, prepare the chocolate ganache. In a bowl, add the chocolate cut into pieces and top it with the double cream, heat up in the microwave in 30 seconds intervals stirring every time until the chocolate is melted. Allow the ganache to cool down completely before topping the cheesecake with it. I put cling film on top of my ganache, allowing the cling film to completely touch the surface of the ganache, to keep it from creating a film on the surface.
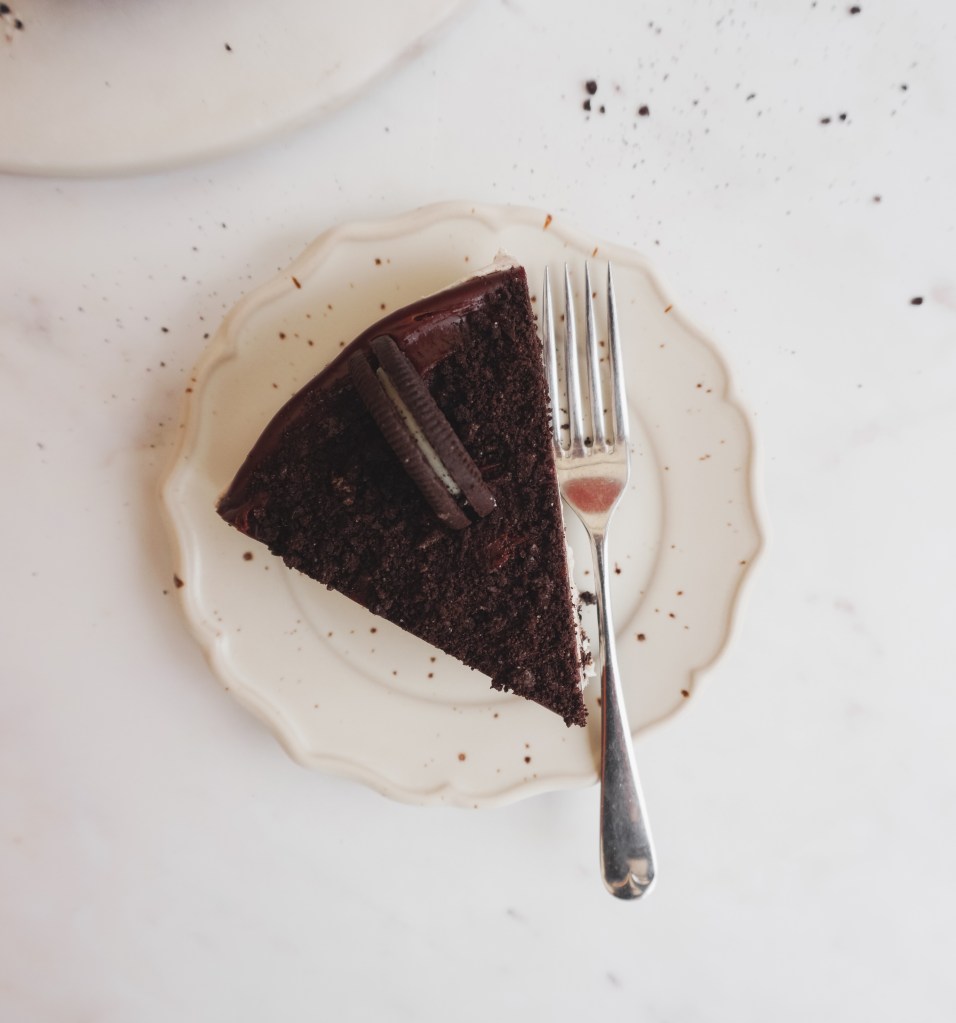
- Once the ganache has cooled down, top your cheesecake with it, you’ll have to do it quickly as the ganache will slightly solidify as the cheesecake will still be cold. Add some extra oreos as decor if desired.
- Keep it in the fridge until it’s time to eat!
